

Divi Guidelines

1. Introduction to Divi
Divi is a WYSIWYG editor (what you see is what you get) – basically, what you see when you edit is the same as what will be live on the website. Divi has built in responsive features, such as viewing and editing components for desktop / tablet / mobile.
Below are two links that will be useful when learning how to use Divi quickly and efficiently. The first link explains what Divi is and how it works. The second link is a search tool to find out about certain components, like the text or image module, and how to use them.
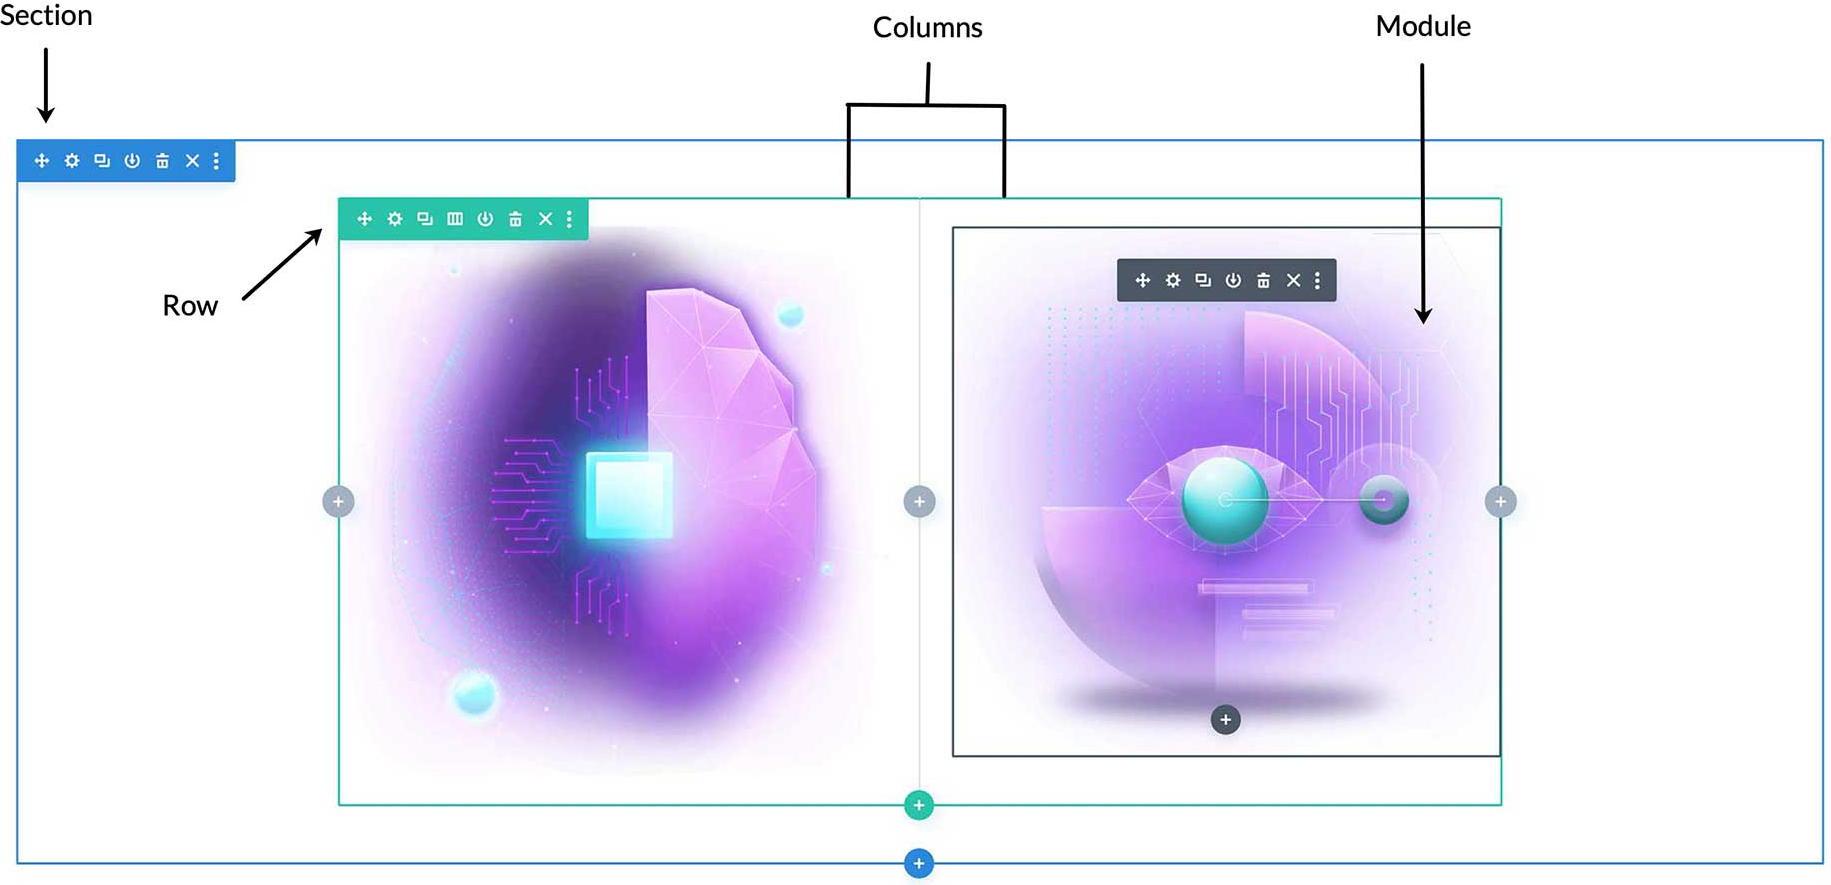
There are three areas used to create a layout: Sections (blue boxes) / Rows (green boxes – can be split into various columns widths) and modules (grey boxes – items such as text boxes, images, videos, buttons). Usually you only need one section and you simply add rows down the page. You could add a single column row with a full width text module, followed by a two column row with images in each column, followed by a three column row with 3 coloured text boxes.
Divi Theme Documentation
When you visit the Divi theme Documentation page, you can search for help for each module (i.e. text module) which will display a step by step page containing all the functions of a text module and how you can manipulate it.
Divi Modules
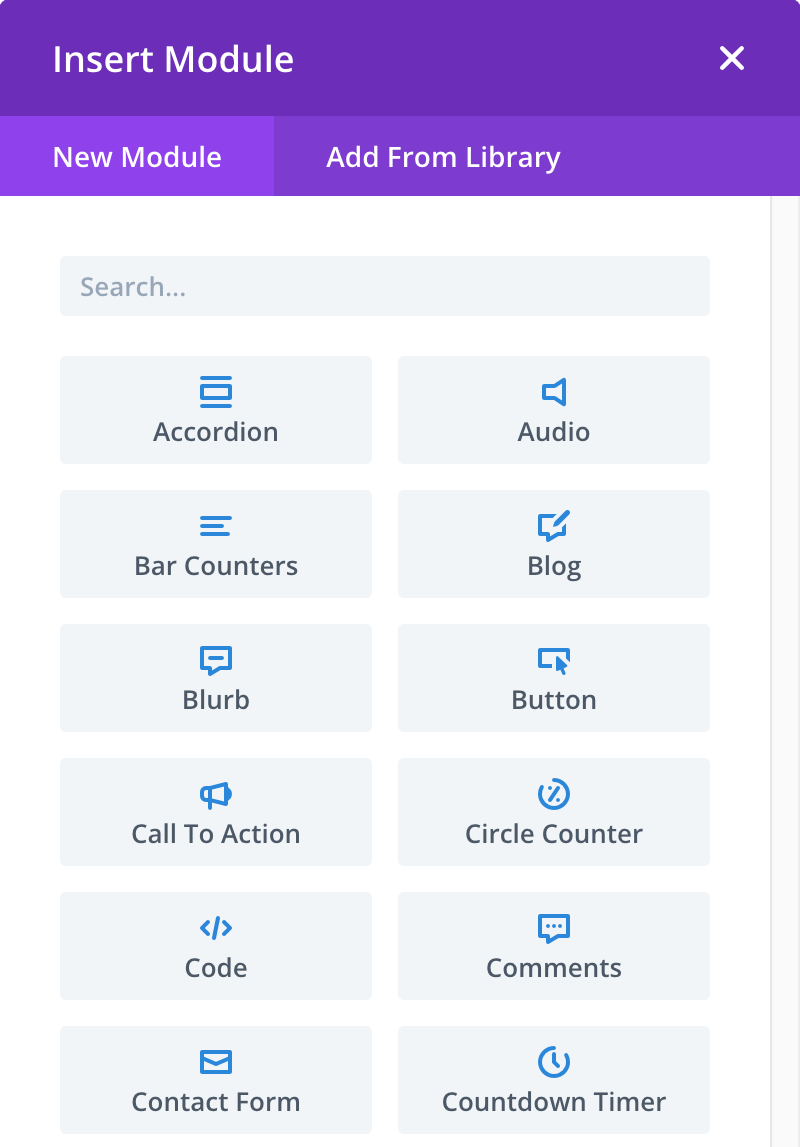
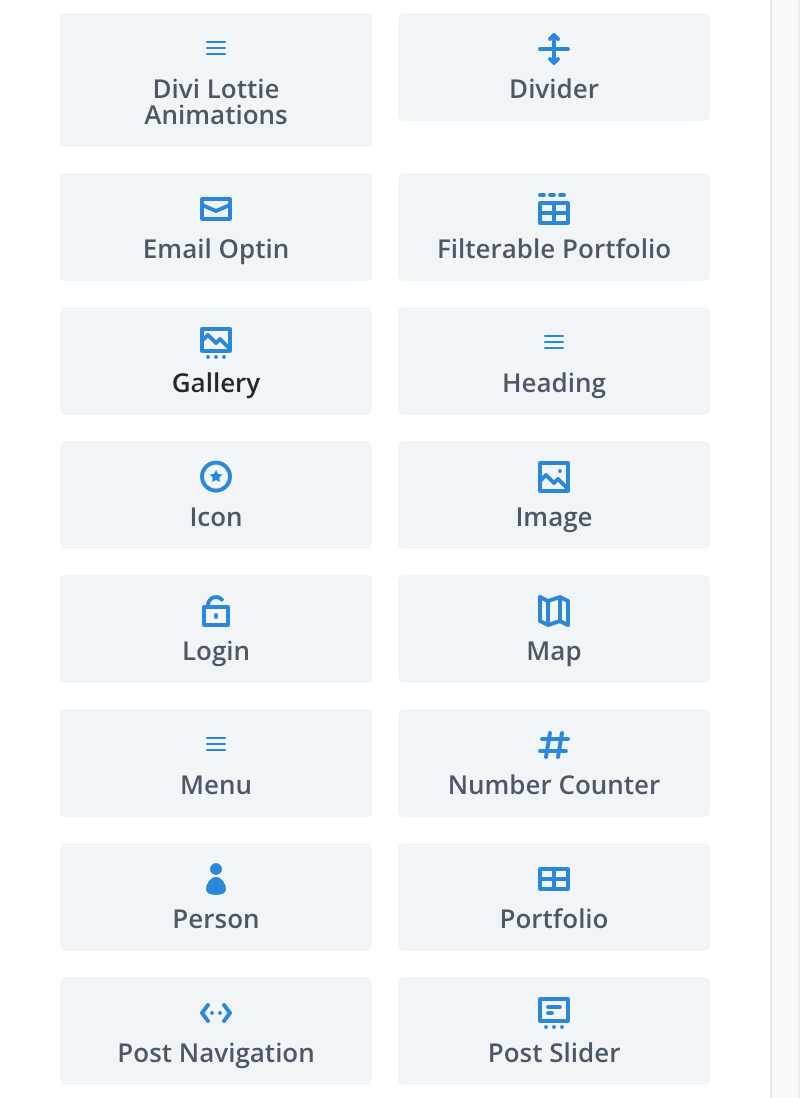
Below are all the standard modules from Divi. The ones you will use the most are: Button / Call To Action / Code / Image / Text / Video. Using the pages I set up for you both, have a practice at installing the modules listed above. I’ve set the body text size, which changes size depending on the device used. When inserting a module, you can start typing in the “Search…” box at the top to quickly find a module.

Module Presets
I have assigned some presets for a few of the modules (and row boxes). You will find these at the top of the module box.
2. Adding a Page
Divi is a WYSIWYG editor (what you see is what you get), which basically means what you see when you edit is the same as what will be live on the website.
3. Editing a Page
Divi is a WYSIWYG editor (what you see is what you get), which basically means what you see when you edit is the same as what will be live on the website.
4. Using Tables
Divi is a WYSIWYG editor (what you see is what you get), which basically means what you see when you edit is the same as what will be live on the website.
5. Galleries
Divi is a WYSIWYG editor (what you see is what you get), which basically means what you see when you edit is the same as what will be live on the website.
6. News
Divi is a WYSIWYG editor (what you see is what you get), which basically means what you see when you edit is the same as what will be live on the website.
7. Events
Divi is a WYSIWYG editor (what you see is what you get), which basically means what you see when you edit is the same as what will be live on the website.
8. Using YouTube Videos
Adding a YouTube video to your website:
- Go to the YouTube video you wish to add
- Click on the “Share” button and copy the link to use on the website
- Insert a video module where you need it
- Delete the example video link
- Add in the link by clicking on the url link (top left)
I think it would be a great idea for your club to start creating content that people might want to see and share. It’s a great way of getting inbound traffic to your website.